Annika, the autonomous chaos driver
Posted | Reading time: 4 minutes and 30 seconds.


We have a robot mover. It’s great, and almost hypnotic watching that little fellow randomly finding its way in the garden. Until one day my kids asked how wall:e (thats how we call it) finds its way. I told them it’s random, and they told me no way. Together we decided to come up with our own roboter that would act randomly to see if it works like the mover.
My kids named the robot Annika
Annika’s Brain
First we tried to come up with rules how Annika would find her way. For that my kids got two different approaches to compare. My girl got the requirement to prove that a random pathfinding will not work, and the robot would always be stuck and learn why this happens, whereas my boy got the task to prove a random movement can be found as such as he could always move on. This looked like this:
What they came out with was that my girl said “turn either not enough, or too much, but most important - it works best if you try to the same movement always” and my boy said “always turn differently, only sometimes the same. And get slow when you approach doors or you’ll hit them with your head”. From there we agreed that indeed randomly should work, and for as long as the random movement is different from the last movement there is a chance to find a working route.
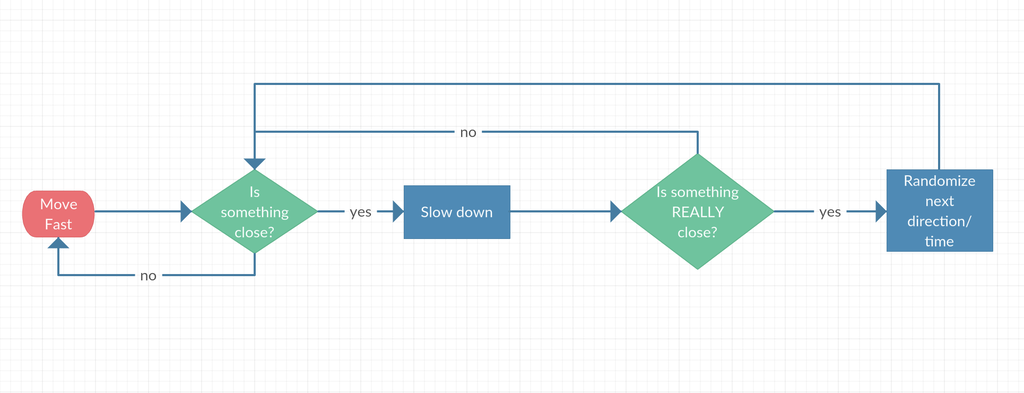
Annika's Brain v1
Collecting the parts
Reading a blog post it might feel as if everything was in place and ready. But everytime we found something new we actually had to reorder it. As we only had the weekends, and on some weekends we did different things, in total it took multiple month to get Annika up and running. In case you want to do it in one batch you might wanna get the following parts early on:
- Elegoo Uno Starter set (if you have breadboard and cables, arduino is enough) (~19 EUR)
- Chassis with 2 motors (~11 EUR)
- Motor Shield (~12 EUR)
- Battery connector for 9V - used that for 9V and also for 12V (5 EUR)
The full source code can be found here: github.com/MatthiasKainer/arduino-annika
Assembling Annika
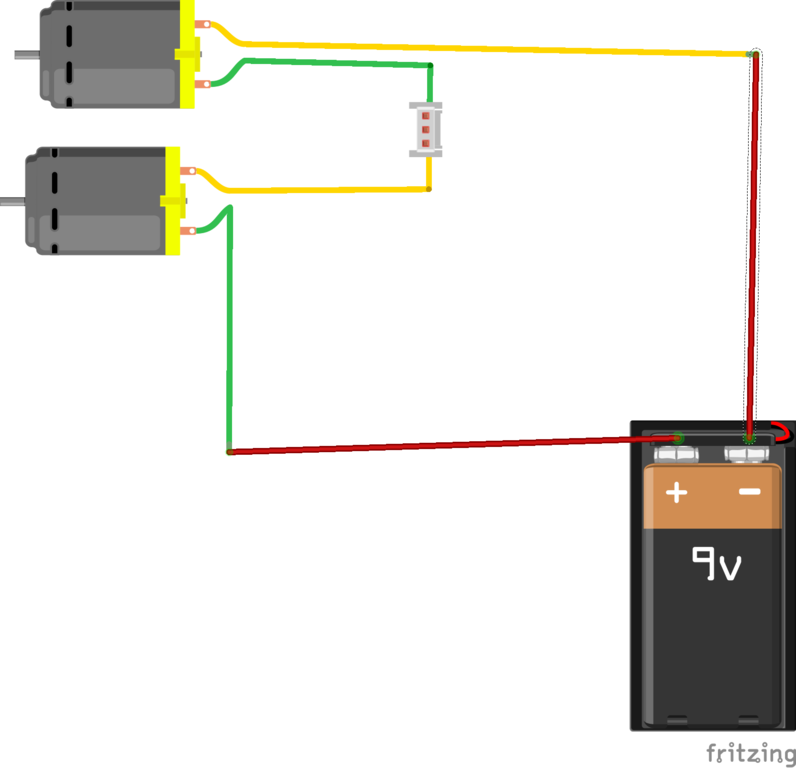
Annika v0 - only connect the motors
We had a two step approach for assembly. The first step was simply to assembly the chassis, and connect the motors to a power source. My Kids are pretty good with assembling parts and simple low-voltage electric circuits by now, so this was mainly their work item.
In parallel I started to cloning a project that we had created during the Robo Nights and adjusting it for our use case as I had a different motor shield.
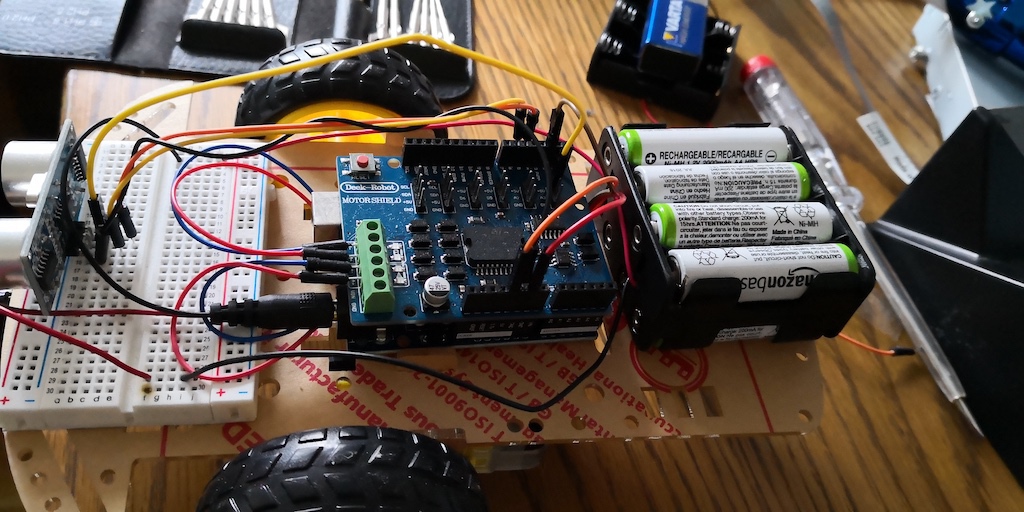
After the kids were done with the chassis we glued a breadboard to the top of the car, put the motorshield on the arduino, connected the Ultrasonic sensor and rewired the setup with the battery to include the motorshield and the sensor.
Annika v1
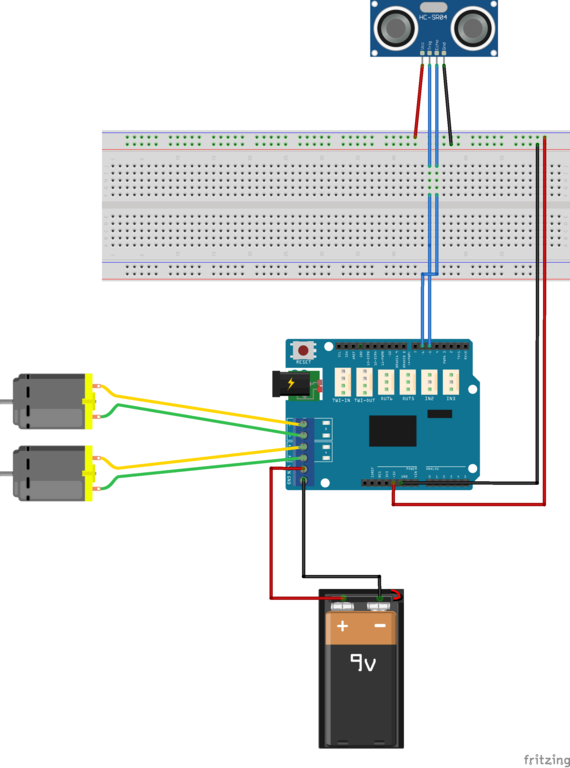
Annika v1 - Arduino Controlled
It was great, in a very short time we managed to had a kinda working Annika that would drive and manage to avoid running into too many obstacles.
However there were issues. The most obvious one was that the ultrasonic sensor seemed to have issues with clapping and screaming kids. The louder and more enthusiastic the kids celebrated, the more likely it was that Annika would fail to detect obstacles, or think to have detected some in the open. While this was kinda okay when Annika would turn on a free run when the kids were clapping, it was more serious when she ran into kids. It’s not helpful for a long lifespan if a robot collides with kids a lot.
We had to come up with a failsafe.
Annika v2
Our failsafe consisted of an IR Sensor. It can report only two states: collision yes or no, and it looks like this:
The idea is that even if the ultrasonic reports no issues, the IR Sensor would act as a fallback. Kinda like:
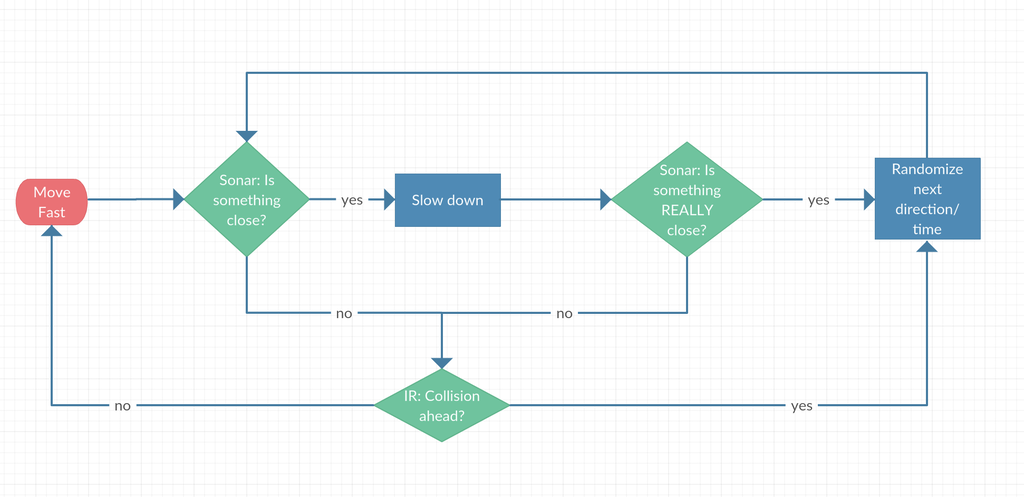
Annika's Brain v2
In theory this worked. In reality the motors hummed but didn’t really start. The problem seemed to be that the 9V failed to deliver enough to power for the two sensors and the motors at the same time. The 9V was already not ideal for the Arduino and drained empty in no time, and now we got over the tipping point. Next iteration of the model was therefore to have an 8 AA slot (12V) as power source.
Annika v2
After we recovered power, the circuit looked roughly like this:
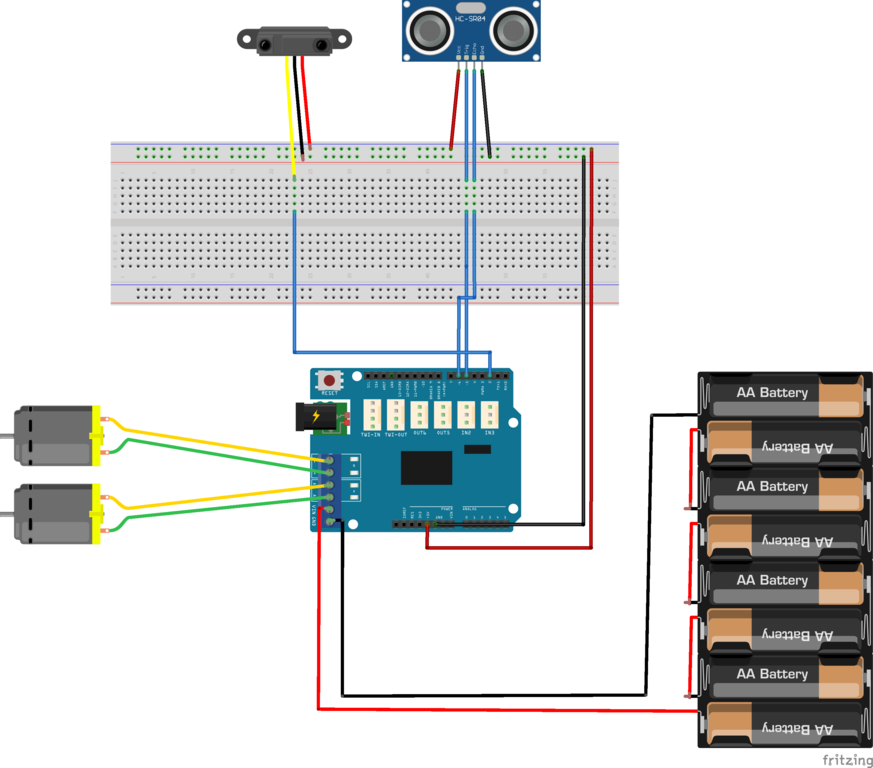
Annika v2 - with failover-eyes and more batteries
Until now nothing was attached to the chassis, and as you can see in above video is this started to cause some issues. The 8 AA Batteries added considerable weight, and Annika was unable to recover from sharp curves.
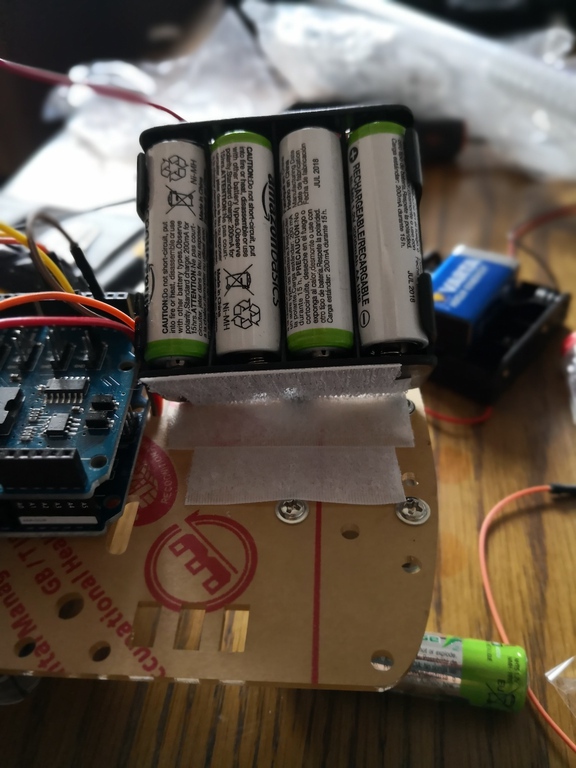
Detachable Battery-case
So we added some tape to adjust it. Also it allows us to (in a later point in time) exchange the items that are attached to the chassis.
Annika is pretty fast, and way more random then the mover. But the basic movement pattern is similar. Next we plan to add a rotary encoder so that the kids can change some of the constant values like speed and random rotation. For an exercise it was great for my kids. They are much more familiar with how to create an algorithm to solve issues, and started to have fun trying to think about implementation for birds (“fly left, fly left, fly left”) and cat (“sleep, look, eat, sleep”), and from that they are more convinced then ever that both the mover and Annika are far more intelligent then our cats.
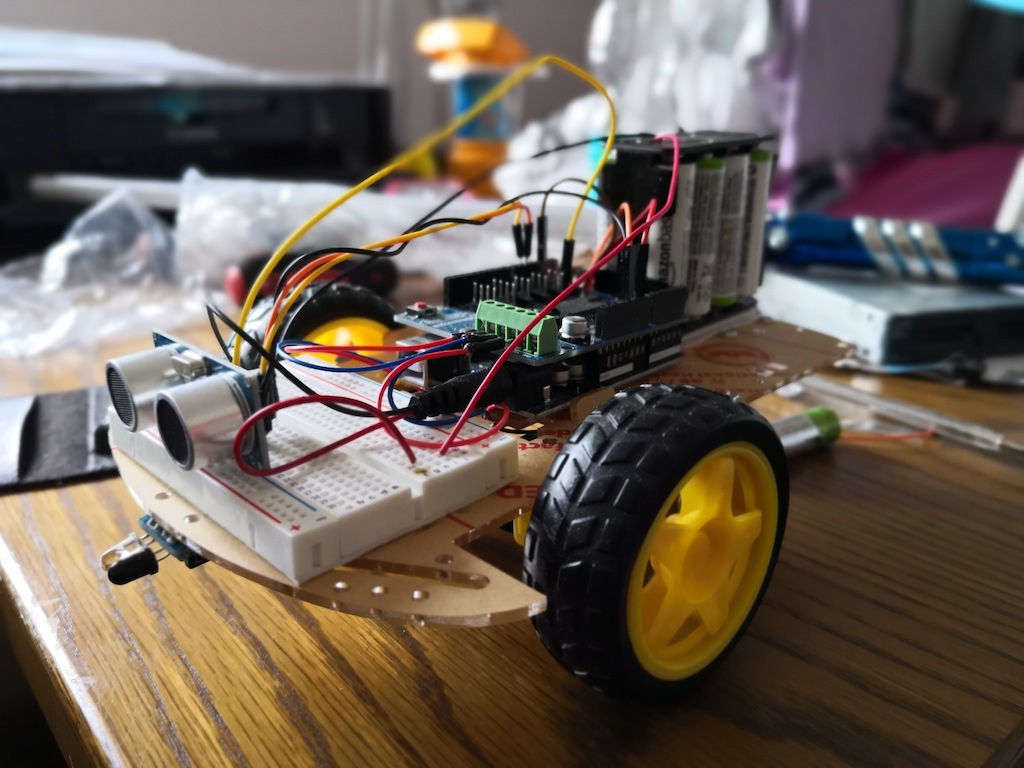
A final view at Annika
From my point of view I love how watching Annika moves around is almost as hypnotic as watching the mover. Something I missed in winter a lot.