DNS with integrated AdBlocking in the local network
Posted | Reading time: 3 minutes and 3 seconds.
Eventually, when your network grows in size, you might want to have a domain name system for your internal network. A domain name system is basically the thing you know from the internet. Instead of typing in 172.217.21.238 you can just write google.com. On the internet however are not only good domains, like google.com, but also superevil ones, like googleadservices.com. If those wouldn’t exist, the bad people on the internet could not track you (or less so), and you wouldn’t see any ads (or less of them). Why not benefit of your own home dns, and have an internet without ads?
I had an old Raspberry Pi Model B (an old one) lying around, together with a slow 2GB SD Card and a free slot in my router. That card is too small to run a rasbian, but all I wanted to run is a DNS without any xserver (user interface).
Luckily there is DietPi, a lightweight linux whose core need no more then 400MB. Download the image from their website, and put it on your SD Card, i.e. via etcher. A more detailed guide can be found here.
Insert the SD Card into the raspberry, connect it to the power and wait until you can see the device on your network.
You can ssh to it via ssh root@$(your-ip), the initial password is dietpi.
An assistant will start, and give you the option to change the password. I would strongly recommend to follow that advice.
The next part will take a little, given the old hardware and the slow SD card, but it’s worth the wait. Basically dietpi configures itself. After a reboot, it will provide option to install additional software. Search for pi-hole, select it with space and hit enter to confirm.
Also, you might want to add a text editor (I choose vim tiny) so we can work on the config files later.
Continue with the installation.
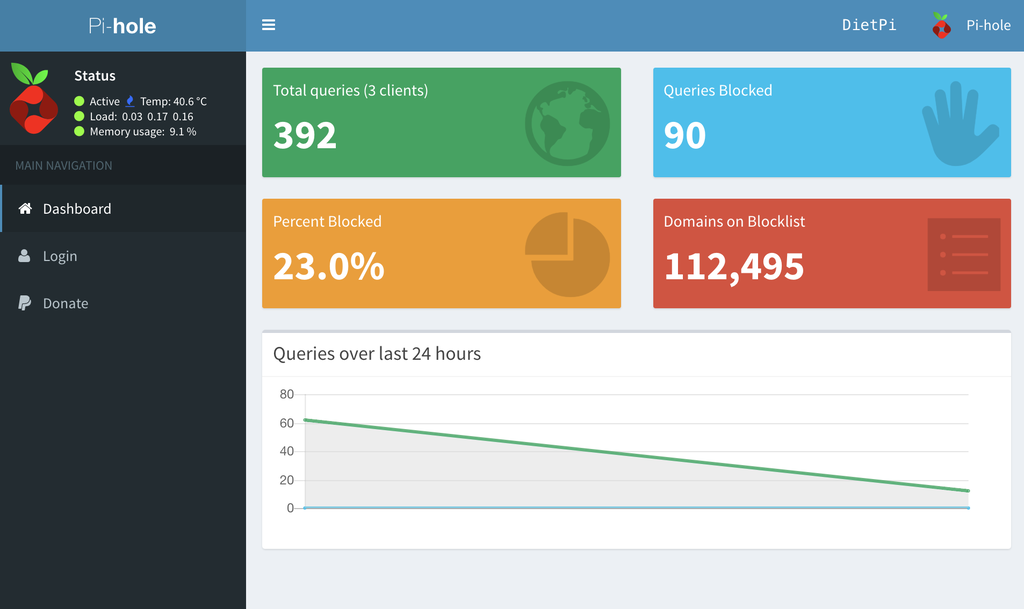
dietpi will start the installer for pi-hole. It will also change the first created password. You can store the latter, and then access it via http://$(your-ip)/admin/
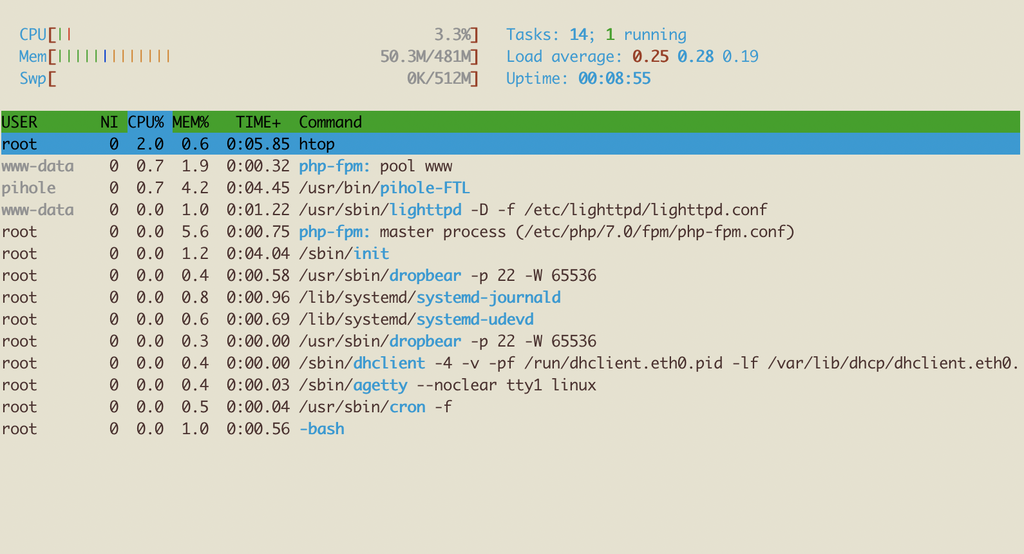
After installation, if you ssh to the raspberry again and do an htop you’ll see that it takes up around 50MB of memory. There’s an lighthttpd, php-fpm, pihole and dropbear running. The memory consumption should be at around 50MB
Note you’ll end up in Europe/London timezone per default. There is a chance that’s not yours, in which case you might wanna run dpkg-reconfigure tzdata.
Add the ip of the nameserver to your DHCP (in most cases your internet router). It might be a good idea to set a secondary one in case you unplug your local one.
 An example for nameserver settings in a t-link router
Next we want to setup our local zone. First decide on a hostname. If you have a domain already you might want to use that. Otherwise choose one of the ones from this page. In our case, we will use .home.
The general idea you can see on the pi-hole page, in a nutshell we are gonna create a host file that will be used for resolution.
Connect via ssh and type
echo "addn-hosts=/etc/pihole/home.list" | tee /etc/dnsmasq.d/02-lan.conf
That adds the home.list file to 02-lan.conf file. Next we have to add the host entries in the format
IP fqdn hostname
to your file. In our case, we first want to add the local nextcloud instance to the file
192.168.1.34 nextcloud.home nextcloud
Now we restart the pi-hole nameserver via pihole restartdns. Open up your browser, and there you go:
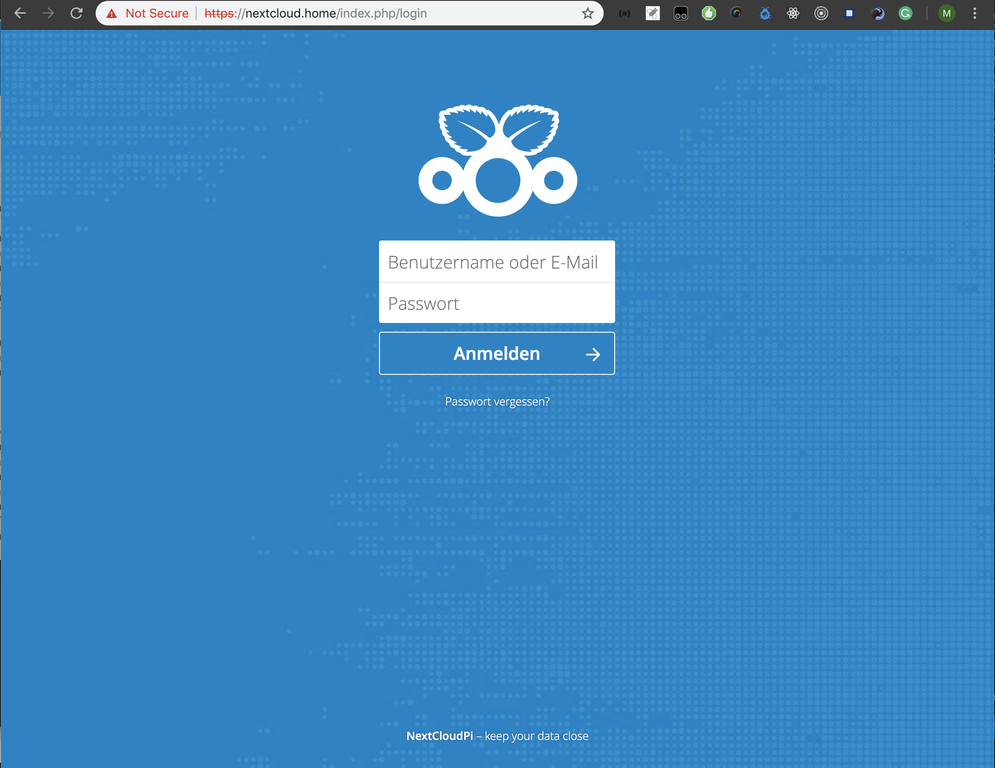
If you haven’t already, that’s the perfect moment to create your own root certificate to avoid that red thing in the browser.
Congratulations, your Internet has become safer and cleaner! If you have kids you can also become superevil and block instagram.com or youporn.com if they don’t behave. You’ll finally be like china.
Of course they can always skip out of your great firewall by setting another nameserver locally. They will however not be able to access your awesome internal domain names then.